


In this article, we are going to introduce you to 6 structures used in construction. From childhood to adulthood, we all use different structures such as houses, warehouses, etc., but we may not know anything about them. In this article by Arin Tees, we are going to introduce you to some types of structures and their construction methods. Stay with us in the future .
Effective factors in determining the type of structure :
Various factors are effective in the type of structure, among which the following can be mentioned .
1: What is the purpose of building a structure?
In the first step, you decide what is your purpose for building the structure. For example, do you want to build a multi-story building or a commercial office building?
The size of the structure :
Another factor that is effective in the design of the structure is its size. If your structure is large, you should use a heavy type of construction. But the construction of light structures does not need to use these heavy methods .
Environmental factors in structure design :
Construction of structures is affected by environmental factors. For example, if your structure is built on the beach, it needs to be high. In earthquake-prone areas, the construction of structures is done with more special measures. In places where the soil has chemical substances, special structures should be used, and in general, each structure is determined according to environmental factors .
Speed required for construction :
The speed of building the structure is of particular importance. There are methods that are more expensive but increase the speed of building the structure several times. Using prefabricated methods is one of these methods that can be very effective in the speed of construction .
The cost of materials used in the structure
In building a structure from different materials, the cost of materials is of particular importance and is one of the issues that affects the structure .
What are the common structures?
In construction, it is common to use 6 types of structures, among which the following can be mentioned. You can use these materials depending on the climatic and geographical conditions, the importance of the structure and the materials you use in it, as well as the speed you intend to build .
Wooden structure :
It is one of the oldest structures in the field of construction, and people have learned to build houses using wood many years ago. This material is found in abundance in nature and is renewable. Different types of beams, joists, piles, etc. are made of wooden timber and are used in the structure under special conditions. Wood is used to build walls and ceilings .
Advantages of using wooden structure :
- These wood materials are renewable .
- The cost of making wooden materials is relatively low .
- They do not need advanced tools for construction .
- They are light and easy to climb .
Disadvantages of using wooden structures :
- These materials are flammable .
- Their performance is disturbed .
- They have little resistance against storms and tornadoes .
2: Light gauge steel structures :
These structures are similar to wooden structures, except that light steel gauges are used instead of wood. These members have a c- shaped section and some are s- shaped. They have more bearing capacity than wooden structures. These materials are protected by a galvanized coating on them .
Advantages of light gauge steel structure :
- They have high strength compared to their weight .
- The cost of using them is almost low .
- They are resistant to combustion .
- The speed of raising them is high .
Disadvantages :
Heat reduces its resistance and the use of cutting and tightening devices is limited .
3: Construction using masonry with beams or supports for load :
In this method, bricks are used to build load supports and lead to the construction of heavy structures that have very little resistance against earthquakes because their flexibility is low and will lead to many losses. The walls in this method are made of bricks or prefabricated blocks. And the floor of the structure is placed as a beam. All the work is manual and usually the worker does these works. This method is not suitable for residential structures and is suitable for commercial structures .
Advantages of building materials :
- It is economically affordable .
- The use of skilled labor is very effective on the speed of the project .
Disadvantages :
- It depends on human power .
- This work cannot be done in cold temperatures .
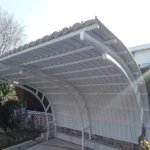
4: Steel structures in their construction and performance
These types of structures are used in large buildings. Steel is used to make columns, beams, beams and other building components. They are usually used to build tall buildings because they are easy to lift. Steel is easy to access. This type of steel is used for the construction of main structures and for the construction of non-structural components of its light type. One of the positive features of steel is its flexibility, which makes it very useful for earthquake-prone areas. This material is used to build large and giant structures as well as bridges .
Advantages of using steel in construction :
- Their weight is less compared to their strength .
- It is easily installed and flexible .
- It is very easy to screw and rivet and weld .
- Steel components are easily available .
Disadvantages of using steel in construction :
- It loses its resistance at a temperature higher than 500 degrees .
- Moisture can cause its corrosion .
5: Concrete structures in construction :
Concrete is also used to make all kinds of structural parts. This material is used in the implementation of tall buildings, half-road bridges, etc. Humans have been using concrete structures for many years. Sometimes the concrete materials are bought from the factory and in a pre-prepared form, and sometimes they are prepared on site by workers, the second method requires more time, and the prefabricated methods are for when the speed is high. The opinion is used. These structures are not so resistant to earthquakes, but they are resistant to wind forces .
Advantages of using concrete structures :
- Concrete components are available on site .
- Recycled steel can be used in concrete .
- Pouring concrete saves space .
- It is very easy to shape concrete and it can be obtained in different ways .
Disadvantages :
- Concrete processing takes some time .
- It does not have much resistance against earthquakes .
6: Prefabricated structures in construction :
If speed is important to you and loan sources are far from you for concrete construction, it is recommended to use prefabricated structures. These parts are prepared in the factory and installed after being transported to the site. This method can be used in the design of various residential buildings, warehouses and workshops. For this, you need to inform your design engineer so that he can help you .
What are the advantages of using prefabricated parts in construction?
- It makes the construction of the structure very fast .
- The design of these structures is easy .
- Tests are done beforehand on the prefabricated members so that they can withstand the incoming load at the site .
Disadvantages of using prefabricated parts :
- Its cost is almost high .
- The designs are limited in that the buildings built with these parts are square and rectangular .
Which structure is better?
If you have studied these structures and their advantages and disadvantages, you are probably comparing them, which one is preferred. We must say that all these structures are useful and important and they are used in their proper place. Try to know the conditions of the place first and choose your type of structure according to that. Do not forget that some structures are not suitable for construction and residential buildings .
Building construction stages from permit to completion of work + checklist and chart
Many people may be familiar with the building construction process, but what makes an engineer professional and expert is knowing the basic and up-to-date points. In order to improve the technical knowledge of engineers, the Civil Academy provides free training and a summary of building construction steps in this article Complete archive of engineering educational videos Paid. Stay with us until the end of this article Civil Academy Stay with the construction stages of the building, such as the construction stages of the metal frame building, the construction stages of the concrete frame building, etc Step-by-step steps of building supervision Get to know completely and fundamentally .
What you will learn in this article :
Chart of building construction stages
Obtaining permits and permits for building demolition and renovation
Actions before building demolition
destruction
Excavation of the building
Implementation of the foundation
Steel or concrete frame? !
Implementation of concrete skeleton
Implementation of the metal framework of the building
Joinery Building
Checklist of building construction steps
Chart of building construction stages
If you are one of the people who are looking for the construction of your old house in the form of participation in the construction or are planning to enter the housing and construction market, do not stop reading this article and stay with us until the end. We promise that you will leave Imran Academy with a full hand .
At first we have to say if you want with Zero to hundred participation in construction To learn more, be sure to click on the blue link and read the related article .
But before getting acquainted with the building construction stages, it is better to know in general what the building construction stages chart is.
The chart of building construction steps is actually a general outline of the steps you need to do to build a building. In the photo below, you can see a sample chart of the construction stages of the building .
Obtaining permits and permits for building demolition and renovation
In the first step of the building construction process, we need to get acquainted with the maze of getting the demolition and renovation permit, which we will describe in detail below .
The first thing we should say at the beginning of this path is that if you have started building a building through participation in the construction, usually the necessary permits and approvals are taken by the builder and the owner is not responsible .
In big cities, the owner or owners should go to one of the electronic service offices along with the required documents and represent the manufacturer to obtain these licenses .
But in small cities, there is no need to go to electronic service offices and these documents can be provided directly to the municipality .
Documents required to obtain a building demolition permit
Original and copy of property document
Benchag (office official document)
Water, electricity and gas bills (perhaps a telephone bill is also needed)
If the property is endowment, a letter of endowment is also required .
Accompanying the completion of the work or demolition and renovation permit, if any
Pay the municipal renovation fees for this year and previous years and attach the receipt to the file .
National card of the owner or owners and manufacturer
The original power of attorney from the owner or owners to the manufacturer
In the next step, the electronic services office sends an expert to the project site to determine the boundaries of the square, the dimensions of the land and the map order, which you can see in the image below .
The map command contains the following information :
Modified land dimensions
Account Type
Number of floors allowed
Occupancy level of each floor and so on
After receiving the map order, it must be delivered to a technical and engineering office to design the architectural map (phase one map) .
Then, you will refer the prepared phase one map to the Vice-Chancellor of Urban Development and get the necessary approval to pay the density fees determined according to it .
After you pay the fees, you enter the draft stage, which is different for different buildings .
When you get the necessary documents in the draft stage, you hand them over to the electronic services office so that the supervising engineer is identified and the demolition and renovation permit is issued with the contract .
Building implementation training includes many details that cannot be included in one article. For this reason, we marked the points and parts that need further explanation with blue color. To read more about each one, click on its blue name .
Actions before building demolition
Most of the construction operations start with demolition, but sometimes it happens that construction has not been done on the land in question. In this situation, there is no need for demolition and construction begins with excavation .
Before starting the demolition, controlled items and measures should be taken. These items include :
Restricting or cutting off water, electricity and gas (this can be done at the same time as the demolition operation begins)
Determining the place of waste collection and disposal (waste contract)
Insuring the workshop against possible accidents
Enclosing the area around the workshop
Protection of sidewalks and public roads adjacent to the building under demolition (protective cover)
Installation of protective footrests in cliffs
Installation of building specifications
Securing and installing warning signs
Examining the stability conditions of adjacent buildings and applying special measures to stabilize the adjacent property, especially if there is a common wall with the adjacent property.
Determining the demolition method and providing the necessary tools and equipment according to the type of location and building
Checking the access of machines to the workshop
destruction
The purpose of demolition in general is to remove, renovate, repair or rebuild the structure, which is done using various tools and equipment .
Demolition generally means to destroy, but from a technical and engineering point of view, it means to separate the different elements of a structure step by step .
The reason for this is the end of the useful life of the structure and the occurrence of various risks such as the building not being safe for living. Also, during demolition operations, it is tried to separate usable materials from waste and reuse them .
Stages of building demolition
In general, the stages of destruction are as follows :
Opening valves, electrical and mechanical equipment such as water heaters, etc
Separation of glass from doors and windows
Separation of openings such as wooden and iron doors and windows from the walls
Removing the waterproofing of the roof and slope materials and reaching the roof covering
All raised structures, including terraces and balconies and components attached to the surrounding walls of the building, must be demolished before the main structure of the building and the structural components inside the floors are destroyed .
Demolition of floor slabs should start from the middle of the opening, and continue towards the support beams. Floor beams should be destroyed in the following order :
Arrows
Sub-beams and beams
Main beams
If the structural stability of the beams is affected due to the loss of the restraints and they are even in danger of falling, before removing these restraints, they should be strengthened by using appropriate restraining systems, such as piling, in such a way that After removing these restrictions, these beams will not suffer from structural instability .
Before destroying the columns and bearing walls, the beams above them must be destroyed and removed .
Before demolishing the load-bearing walls, the non-load-bearing walls above them must be demolished .
During the entire demolition period, no exit way should be destroyed before another approved way replaces it .
Building demolition training in different ways
Different methods are used to demolish the building. These methods include :
Manual demolition of the building
In this method, the building is demolished manually and the waste is removed using a loading machine. The speed of this method is low, but if the safety tips are followed, it is more secure .
An important point that must be observed in this method, It is necessary to use safety belts in cliffs and places prone to falling .
If the demolition team does not use safety belts, helmets, etc., they may be irreparably injured .
The demolition of the building was done manually using tools such as sledgehammers, pickaxes, or hammers, starting from the roof and then continuing to the walls .
Manual demolition starts from the highest part of the building and continues floor by floor to the lowest part of the building .
When destroying manually, pay attention to the following points :
A concentric hole should be created in the roofs of all floors to transfer waste to the bottom of the building. Pay attention to this point, it should be safe and there should be enough space around this hole for the movement of people .
Do not deposit too much on a shingle roof, as there is a possibility of the roof collapsing. If there is a need for an excessive amount of storage, place jacks under the roof so that the roof does not collapse .
Bricks, blocks and all components that can be reused in the implementation, are grouped and arranged in one part .
Before demolishing the walls, check whether the wall is shared with the neighbor or not?! Or do they rely on each other or not?
The destruction of the common wall will be different and have more details than in the article ” Demolition of the building “ We will address these issues. We suggest that you do not miss reading this article at all .
The order of demolition should be based on loading. For this reason, the slabs must be removed first, then the secondary beams, the main beams and finally the columns must be destroyed .
If it is a load-bearing wall, first the beams must be removed and then the wall is destroyed .
The successive tools used in manual demolition can be sledgehammers, hammers and axes, shovels, shovels, pickaxes, demolition pens, drills, milling machines, drills, demolition hammers or concrete mixers, footing boards, barrels, water hoses, machines Air cutter, metal scaffolding, rope, pulley, hoist, pneumatic demolition hammer and compressor device .
Mechanical destruction of the building
In the mechanical method, machines are generally used to demolish old and dilapidated buildings .
Demolition by mechanical method has different forms, which can be mentioned using excavator, demolition ball and hydraulic boom crusher .
Pay attention to the following points during mechanical destruction :
1) It is prohibited to move and place these machines in the following areas .
A distance of 2 meters from the edges of the building
1 meter distance from the edge of the openings
Any structural member
2) To specify the permissible range of movement and placement of machines on the floors, warning signs such as various types of tapes, creating marking strips on the floors by painting the floors or other appropriate devices should be used .
Using an excavator in the method Mechanical destruction
One of the common ways to demolish a building is to use an excavator .
This method involves higher speed, more cost, more vibration and less safety, and in normal buildings, the excavator is usually entered at the end of the demolition process .
At the end of the arm of these shovels, a scissor, picor or stone crusher is attached. In this case, the destruction of the structure is done from top to bottom .
Use the wrecking ball in the method Mechanical destruction
In this method, a steel ball that hits the structure in a reciprocating manner is used .
It acts as a destruction ball from outside the building. This method is suitable for dilapidated buildings, silos and other industrial facilities .
However, the operation requires a lot of free space around the device .
This method requires a highly skilled operator, which is generally less used in urban construction .
Demolition of buildings using explosives
The building collapses on itself due to the gravity of the earth, and explosives are the only spark to start this collapse at a suitable point of the building .
They put explosives in the foundations and columns of the building and then blow them up; By destroying the foundation of the building, the structure collapses easily. If this method is used, the building will fall into one of the following two states :
Fall like a tree
Fall in place
Note that the demolition operation using explosives is fully planned, engineered and has complex and precise calculations so that the building collapses exactly in the intended place and does not cause damage to the nearby buildings .
Excavation of the building
In the construction stages of the building, after the demolition, it is time to excavate and excavate. But as you know, soil mechanics tests must be done before that .
The results obtained from the laboratory determine the characteristics of the local soil and the level of underground water, especially the presence and depth of problematic soils such as manual soils .
Also, according to this test, the technical recommendations about the type of foundation, the allowable strength of the soil under the foundation, the expected settlements and the design parameters of the retaining walls are also determined .
Excavation is performed in all kinds of construction operations. For example, in the field of road construction, it means removing the unevenness up to the base level, but in building construction, it means removing the unevenness of the soil up to the foundation of the neighboring building .
Any kind of digging and excavating at a level lower than the natural surface of the ground or at a level lower than the foundation of the adjacent building is called excavation .
One of the pit stabilization methods should be used during excavation. Excavation is one of the dangerous earth operations that cause unpleasant accidents every year due to non-compliance with technical and safety issues .
Excavation and excavation stages of the building
The principles of excavation and piling to start the implementation of the foundation include the following :
Checking the existence of wells, aqueducts, etc
Examining nearby buildings and their level of strength
Taking the natural levels of the earth with appropriate mapping methods
Lowering the water level in excavations that are below the water level
Determining the calculated volume of earthworks and the number of trucks required
Designing a leveling map according to the level of the adjacent lands and the slopes required for drainage, the level and depth of the foundations.
Excavation and stabilization of pit walls
Harvesting the removed vegetable soil and stabilizing the soil under the foundation (note that the construction of heavy structures on the embankment consisting of clay and silt or fine-grained sand is not allowed.)
Implementation of engineering embankment in thin layers and with the specifications considered by the designer in the conditions where land leveling is associated with embankment .
Types of pit stabilization methods
Now that we are familiar with the concept of excavation and excavation, we will introduce various methods of pit stabilization. Each of these methods has its advantages and disadvantages, which are chosen according to the project conditions. These methods include :
Inclined excavation
If the side spaces of the area are open, excavation can be done by sloping the walls of the pit or using steps. This method is suitable for pits with shallow to medium depth .
Note that if there are buildings or special facilities around the pit area, this method will not work .
Truss guard structure
One of the most common methods of implementing the guard structure and stabilizing the pit wall in urban areas Truss guard structure Is. The implementation of this method is simple and does not require high equipment and expertise .
Also, this method has a lot of flexibility to be implemented in different conditions. One of the disadvantages of this method is that it gets stuck in the pit .
nailing
As we said in the video above, the soil nailing operation is one of the innovative methods to stabilize the trenches and provide horizontal support for the excavated walls to prevent the soil from sliding .
The important thing that you should pay attention to is that the tensile force in the nails is activated when some displacement is created in the system .
This issue may cause problems in neighboring buildings with sensitive use. Therefore, in choosing the type of support system, the permissible displacement of adjacent structures should be considered .
anchorage
using method anchorage And using the shaft of the harnesses causes less displacements in the soil of the pit walls and structures adjacent to the pit .
The use of a retaining rod is a common method as a retaining element for retaining walls and sprayed concrete surfaces. By installing the harness shaft, it is possible to transfer the tensile load to the layers of soil or rock .
The nature of the nailing system causes displacement and lateral deformations in the soil to maintain it. This is despite the fact that sometimes even small lateral deformations are dangerous for the building or facilities adjacent to the pit .
Therefore, the use of systems that are potentially active (such as the inhibition system) can solve this problem .
Mutual restraint
Mutual restraint or the same Strat It is usually used to maintain and protect walls resulting from excavation in pits with a small width in urban environments .
The method of bracing the walls is done by horizontal braces and compression ties, and it is very similar to the truss method, and in some cases, they are used in combination .
Candle performance
Pile or deep foundation transfers the load of the upper structure to the ground by the friction of the foundation wall and the resistance of the foundation tip. Piles are used when the bearing capacity of the ground is low or the load of the structure is high .
Piling system is usually used in places where :
The structure adjacent to the pit is very sensitive to the change of location or does not have sufficient structural integrity .
In the future, there is a possibility of excavation in the vicinity of the structure under construction .
The guard structure must be permanent, such as excavation for the implementation of non-level intersections
The underground water level should be high in such a way that it is not possible or difficult to control the entry of water into the pit with other methods .
To learn more about the topic Piling Be sure to click on the blue link and read the related article .
sheet pile
Shields are actually long plate elements made of wood, reinforced concrete or metal, which are installed in the ground by hitting or vibrating in the form of locks and fasteners and are considered part of the separating walls .
Of course, nowadays, in practice, metal shields with sections including U section, Z section and linear section are used .
Be careful that in pits with a small width, the shield plate is restrained with horizontal push handles, perpendicular to the wall on both sides of the pit. Meanwhile, to restrain the pits with a large width, the inclined supporting members are used to restrain the back of the horizontal ties .
To learn more about the concept and steps of the implementation of shielding or Pile Be sure to click on the blue link .
Diaphragmatic wall
In the 1950s for the first time in Italy, Diaphragmatic wall was used and since then, this method has been widely used in different parts of the world .
This method is mainly used to create a watertight curtain in dam construction operations .
But it is more or less effective in stabilizing the pit wall and nowadays it is used more and more in the construction of underground metro stations .
By using this method, the soil guard wall can be implemented before the excavation operation. This method is especially effective in cases where construction works are carried out below the level of the underground water level .
an island
Excavation by island method is a special technique in which stabilization of the pit wall is done by the method of mutual containment and taking help from the central part of the building in progress .
In this method, vertical support elements are first installed around the pit at appropriate intervals, like the mutual restraint method. Then, excavation of the central part of the project site is carried out by keeping the soil on the side of the retaining wall in a sloping or stepped manner until the bottom of the pit .
After that, the main structure will be built in the central part .
In the following, after the main structure in the central core has been executed from bottom to top in the floors above the pit, excavating the remaining parts of the pit on the sides and installing the pressure restraints between the retaining wall and the main structure from top to bottom as in the execution The mutual restraint system starts .
top down (from top to bottom)
In this method, the construction of the underground structure is done from top to bottom, and it is the opposite of the common methods of building foundations .
In the first stage, the columns of the structure, including the length of the negative floors and the restraining length to bear the incoming load, similar to the vertical elements in the truss guard structure method, are implemented and they start digging .
By removing the pit the size of a negative floor, it is time to implement the retaining walls to control the soil pressure and then implement the roof .
The floor slab is a permanent structure that replaces the pressure restraints in the braced excavation method to resist the soil pressure behind the retaining walls. These steps continue until the foundation level is reached .
In this method, the construction of the underground structure is completed with the completion of the excavation process .
In cases where the method top don It is used in the form of manual wells, the soil of the desired land must have relative adhesion so that the wall of the well remains stable, but if the appropriate equipment (grab or hydrophoresis) is used, this limitation disappears .
Of course, it is not possible to use this equipment in urban construction .
The best way to stabilize the well
Now that we are familiar with pit stabilization methods, we must say that none of the mentioned methods is preferable to other methods, but the choice of each of them depends on the following factors :
pit depth
Usually, the appropriate stabilization method is selected according to the depth of the pit in urban land as follows :
Depth up to 7 meters Truss guard structure, nailing
depth 7 to 15 meters Nailing, piling, anchoring, cross anchoring
depth 15 to 25 meters Anchorage, mutual anchoring, diaphragm wall
depth of more than 25 meters Anchorage, diaphragm wall
pit overhead
Pit overhead includes the following :
Live and dead loads of adjacent buildings
Stopping or driving vehicles on nearby roads
Materials and equipment placed in adjacent lands
The sloping part of the adjacent lands
Characteristics of soil and pit wall
Characteristics of the vicinity around the walls of the pit
Land slope, administrative and technical rules and regulations
Available machinery and manpower, the prevalence of stabilization methods and economic conditions
in the article ” Building Excavation “ We talk about excavation and its principles in detail. We recommend not to miss reading it at all .
Implementation of the foundation
In this article Step-by-step steps of building supervision According to the tips and implementation training Types of pi we pay
As you know, the foundation has the main task of transferring the load of the structure to the ground .
There are different types of foundations according to the type of materials used and the way to transfer power to the ground. As you know, choosing the type of foundation is done according to the ground conditions and applied loads of the structure, and they are generally divided into two types: surface foundation and deep foundation .
Surface foundations are divided into the following four main categories according to their dimensions and the number of columns placed on them :
single pi
- Bascoli
Strip foundation
wide base
Foundation implementation steps
In general, for the implementation of the foundation of a structure, we must implement five stages of placement, implementation of concrete, reinforcement, molding and concreting, which we will explain further about each of them .
Foundation placement
The first step after excavation is to place the foundation .
After adapting the north direction of the map to the geographical north of the project location, one of the longitudinal or transverse axis whose position is marked on the map is implemented on the ground with at least two nails at the beginning and end. (This extension is called the base axis.)
Now, other longitudinal and transverse axes are determined from the base axis. In order to control the verticality of the axes, the Pythagorean theorem (which is also called the golden triangle 3, 4 , 5 ) can be used .
One thing that should be noted is that when implementing the map on the ground, in order to avoid the accumulation of errors, the measurements should always be calculated from a point of origin and transferred to the ground .
Also, pay attention to the fact that the horizontal length of the sides should also be used as a criterion in sloping lands .
After determining the limits of the plan, the axes are determined using stringing and plastering on the ground .
This operation is carried out in large projects with a mapping camera, but it is applicable for small works with work string, meter, gunya and level .
After ensuring the exact placement of the foundation, manual adjustment of the floor and reaching the height code listed in the map, the pit floor should be chrome plated .
Implementation of concrete unless
As we said in the video above, after chrome plating, it is time to apply concrete. Mager concrete is concrete with a cement grade of 100 to 150 kg per cubic meter of concrete, which is made with a thickness of 10 cm .
Concrete is implemented and does not have a structural role except for the reason of preventing the absorption of foundation concrete sap by the ground. Also, this concrete prepares a smooth and dust-free surface for foundation reinforcement .
To read more about Lean Conceret and its executive details, click on the blue link and read the related article .
Foundation reinforcement
As you can see in the video above, you should pay attention to the fact that if the foundation molding is metal, the reinforcement is done before molding. But if the molding is done with building materials like bricks, the reinforcement is done after molding .
Foundation reinforcement consists of three stages :
1) Implementation of the lower mesh
2) execution of the vault reinforcement
3) Implementation of the upper mesh
If you have any questions What is a vault? Be sure to click on the blue link and read the related article .
In reinforcing the foundation, pay attention to these points :
Between the lower mesh and the concrete, a distance must be created by means of concrete or plastic spacers .
The reinforcement of the vault should be placed on the lower mesh. If the vault reinforcement is not installed on the concrete, moisture is transferred through the vault to the main reinforcements, which causes them to rust and create cracks in the concrete .
Simultaneously with the implementation of the foundation network, the implementation of the reinforcements for the column and shear wall in concrete skeletons and the placement of bolts and plate columns in metal skeletons are done .
In concrete skeletons, make sure that the column spacers are implemented in the thickness of the foundation .
According to the 9th issue of the 92 edition, the bending direction of the reinforcement of the column in the foundation should be outward or so called solar. But the ACI regulations concluded after conducting tests that this bend has better performance if it faces inward .
For this reason, the 9th issue of the 99th edition was amended and required the bending of the rebar to wait for the foundation towards the inside .
in the article ” Foundation reinforcement “ We talk completely about the executive detail and minute to minute points of this topic. We suggest not to miss reading it at all .
Foundation molding
After finishing the reinforcement of the foundation, it is time to mold it. The finished dimensions must be done according to the foundation drawings .
For this, first the lines are drawn and the borders of the foundation mold are drawn and nailed on the ground .
If a brick mold is used, a layer of sand, cement or plastic mortar should be used to cover the inner surface of the mold .
Also, the openings (pots) are filled with soil to prevent the fall of the brick walls due to the lateral force of the concrete .
In cases where the foundation is limited on both sides to the adjacent property and the earthen wall of the pit, and it is not possible to mold, the wall where the concrete will be in contact with the soil can be covered with nylon so that the concrete does not have direct contact with the soil and the water in the concrete is preserved. .
direction Foundation molding The following types of templates are used :
metal mold
brick mold
wooden mold
Modular format
Foundation concreting
As you can see in the video above, after finishing the formatting and making sure that it is executed correctly, it’s time to Foundation concreting arrives _
Foundation concreting is done by mast pump or ground pump from the farthest point and gradually spread on the foundation level .
After pumping the concrete and spreading it on the desired surface, it should be vibrated in the foundation grids so that it is well compacted and uniform .
High accuracy at this stage will facilitate the implementation of the next stages of the structure, increase speed, quality and prevent possible rework .
After the concrete is compacted, it is time to polish its surface. Concrete surface polishing is done due to leveling and removing unevenness .
Be careful, since the volume of foundation concrete is very large, it may be concreting in one or two stages and in some parts we will have to stop this operation .
If you wish with Cutting concrete in the foundation To learn more, be sure to click on the blue link and read the related article .
The cutting of concrete in the foundation is done by rabbits so that the leveled surface has a good integration with the next concrete mixture that is poured .
Be sure to pay attention to the fact that during the concreting of the foundation, the distance between the concreting stages should not be increased so as not to create a cold seam .
Concrete processing and mold removal
After concreting is finished, curing must be done to achieve the desired concrete strength. Types of concrete processing methods are :
Concrete processing with water
Concrete insulation treatment
Concrete curing with water vapor (concrete curing with steam)
In the article ” Concrete Processing “ We talk about how to implement each of these methods. So don’t miss reading it at all .
After the concrete dries and the desired strength is reached, the formwork can be removed. Pay attention not to damage the foundation during molding .
9 hours for a temperature of 24 degrees and above and at least 30 hours for a temperature of 0 degrees . It is obvious that if a brick mold is used, the mold is permanent and remains in use .
At the end of this section we have to say to read more about the details Implementation of the foundation And its implementation points, be sure to click on the blue link and visit its article .
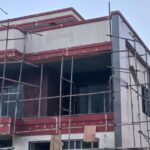
Metal or concrete frame? !
Each of these skeletons has its own advantages and disadvantages .
For example, the steel frame has a high execution speed, but it also requires more initial capital. The concrete frame has a slower implementation speed, but the capital will gradually enter the project .
in the article ” Difference between metal and concrete frame “ We will fully talk about the special features of these two types of building skeletons so that you can choose the type of structure that suits your conditions .
Implementation of concrete skeleton
So far the article with many implications in the construction industry with observation We got acquainted with the complete archive of engineering educational videos of the Civil Academy .
Now it is better to go to the concrete skeleton implementation training. As you know, the use of concrete in the construction of skeletons dates back to the early 20th century. Concrete technology, like any other technology, has become more advanced day by day and has increased its use in all kinds of structures, including buildings, bridges, and dams .
Concrete skeleton is a set of foundation, column, beam, roof and lateral bearing system, which these elements are generally made of reinforced concrete .
Normally, the useful life of the concrete frame is between 50 and 60 years, and if its elements are well designed and executed, it will have a high resistance against the force of earthquake and wind .
To learn about the steps of concrete skeleton implementation, first watch the following video, then read the rest of the article. This video is only a short part of the professional training of Imran Academy’s building implementation training .
In the rest of this part of the article, a summary of the steps is described Implementation of concrete skeleton We will pay, but if you want to know these steps from garlic to onion for free, be sure to click on the blue link .
Construction stages of concrete frame building
Before we describe the concrete skeleton implementation steps, you should pay attention to the fact that the plans must be completely checked and controlled and the complete compatibility of the structure, architecture and facilities plans must be ensured .
For example, the location of columns, the height of hanging beams, the dimensions of the parking lot entrance, the axis distance of columns, height codes, the location of installation ducts, etc. are common cases of differences between maps .
But let’s go to the steps of building a concrete frame building :
Reinforcement of columns and shear walls
The first point in this section is to note that if the skeleton of the structure is of concrete type, during the execution of the foundation, the rebar for the column should be installed .
Column waiting armatures are implemented during foundation armature and during foundation concreting, they should be covered by a nylon so that concrete does not fall on the armatures .
At the same time as the reinforcement of the column, the reinforcement of the shear walls is also done. In order to reinforce the shear wall such as columns, we must have already implemented the waiting reinforcements during the reinforcement of the foundation .
In reinforcing the columns, first the longitudinal bars are cut to the appropriate size. Then column reinforcements are patched to waiting reinforcements by one of the following three methods :
1) cover patch or overlap
2) Coupling
3) Forging
If you want, with all kinds of patch reinforcements such as coupling or Rebar support patch Be sure to click on the blue links and read the related article .
The length of the required reinforcements in the column is equal to the sum of the following three values :
column height
The thickness of the roof
The length of the harness that is determined from the structure drawings .
In the next step, the tights are cut and bent. As a workshop recommendation, first place the tights in the waiting armatures of the column and after the implementation of the column armatures, put the tights in the designed place .
Narrows in the column have an enclosing role and are one of the important elements of ensuring the structure’s plasticity .
After the reinforcement of the column, the frames are executed to align the columns . Ramka There are two rebars perpendicular to each other, which are tied to the reinforcements by the reinforcing wire .
The important point in the implementation of metal frames is that they should not be welded to the main reinforcements .
Molding and concreting of the column
After the reinforcement, it is time to format the column. Columns are molded by wooden or metal molds. Today, due to the high speed of metal molding, this type is used more often .
Metal molds must be cleaned and lubricated beforehand. The molds are lubricated with diesel or burnt oil. Then the molds are closed with pins and wedges and are plumbed .
Of course, it is recommended to use mold release materials to lubricate the molds .
After completing formatting and controlling it, Column concreting is done Since concreting is done from a height, it must be implemented according to its own principles and tips. Improper concreting of the column causes the separation of the concrete members, and in the end it becomes ceramic concrete .
After concreting, the columns should be leveled again, because the forms may be tilted due to the pressure of concreting. After finishing concreting and concrete setting, the forms are opened and it is time to implement the foundation and molding of beams and roof .
Substructure and molding of beams and roof
For the foundation of the roof, first, the scaffolding pipes are tied to the armatures of the column by carpentry wire, then the safety bases are placed under the scaffolding pipes at intervals of 1 to 1.2 meters and are tied together with carpentry wire .
The maximum distance between the bases is 3 meters, which is the value for prestressed beams. The distance between the bases should not exceed 3 meters .
Then the wooden boards are placed on the scaffolding tubes. These boards are pierced by 8 cm galvanized nails and the carpentry wire is passed through this hole and then tied to the scaffolding pipe .
The side forms of the beam are executed after the reinforcement of the beam. To read more about the roof and beam substructure, go to the article ” roof molding “ visit _
Beam and roof reinforcement
In this step, the longitudinal reinforcements of the beam are tied to the rebar of the column by means of reinforcing wire. Pay attention to the fact that, like the implementation of the column, the slats must be placed in the longitudinal armatures beforehand .
After closing the longitudinal reinforcements, silencers are placed at certain intervals .
Be careful, if you are using the block beam roof for your structure, after completing the beam reinforcement, you should place the beams at certain intervals and put a ceiling block between the beams .
Pay attention to the fact that in order to integrate the function of the beams and prevent the vibration of the roof, middle coils (tie beams) must be implemented .
Also, in order to properly connect the beam to the beam, Edca reinforcement is used, and negative moment rebar is used to resist the negative anchors of the support .
At the end of the roof reinforcement section, thermal rebar is installed on the roof at certain intervals to deal with thermal stresses. Thermal reinforcements should be separated from the blocks by floor spacers in order to perform properly and affect the concrete surface .
We suggest that if you want to get acquainted with the tips and details of the block beam ceiling, Professional training in the implementation of beam and block ceilings Do not miss Imran Academy under any circumstances. Click on the blue link to download and view this tutorial .
This training is free, but in order to show the training videos better, the Spot Player platform has been used, and you will have access to this comprehensive training only by paying a license fee of 70 thousand Tomans .
It is true that block beam roofs are usually used in Iran to implement concrete skeleton roofs, but other roofs are also capable of being implemented in this type of skeleton, and according to the existing conditions, a design engineer can choose any of them. These ceilings are :
Yobot roof
Kubiax roof
Babel deck ceiling
Implementation of the waffle roof
Pre-tensioned roof
To read more about the implementation of each of these roofs, click on its blue name .
Roof concreting
As we said before in the foundation concreting section, the roof concreting starts from the farthest point and gradually spreads on the roof surface. Vibrating concrete plays a very important role in proper placement and not cracking of concrete .
After spreading concrete on the surface of the roof, polishing the concrete surface is done to level the concrete mixture and create a smooth surface .
Pay attention to the fact that before concreting the roof, a series of things must be controlled, such as the strength of the jacks, correct formatting, correct implementation of the middle coil, etc.
Molding
Formwork should be according to weather conditions and the requirements of the ninth topic of the National Building Regulations. If the molds and foundations are removed earlier than the appropriate time, damages and cracks will appear in the concrete, which will cause its performance to be weak .
Opening the molds and removing the safety bases should be according to the table below .
If the concrete becomes creamy after removing the mold, it should be repaired with grout (high resistance mortar) .
After opening the molds, it is necessary to treat the concrete by spraying water, installing a wet sack or using chemicals for at least 3 days .
Concrete processing is done to reach the desired strength .
Most of the subjects that are taught in the university are either not related to civil engineering or mostly follow calculation topics .
Although computational topics form the basis of technical knowledge in civil engineering, but accept that a small percentage of graduates enter the field of design and calculations and work mainly in the implementation or supervision sector .
If you think about your university days, you will definitely confirm that very little was given to building construction training and what was taught is not enough to be present in the competitive job market these days !
In order to become a professional in building construction, you must use the experience of professionals .
At Imran Academy, we tried to provide you with all our experience that we have gained over many years .
By viewing the tutorial Construction stages of concrete frame building You will learn from zero to one hundred concrete skeleton implementation tips along with basic workshop videos. This training is the second step of the comprehensive and complete training of the building construction process of the Civil Academy .
Implementation of the metal framework of the building
Up to this point, the article teaches the steps of building construction using Complete archive of educational videos of civil engineering academy with We learned about concrete skeleton implementation. But how familiar are you with the implementation of the metal framework of the building?
In general, we need a large volume of concrete in sections to implement the concrete skeleton. This is while we reach the same resistance in metal framework with smaller sections and less concreting volume .
So, by comparing the weight of metal and concrete structure, we realize that the weight of metal frame is less .
If the initial capital is large and in sufficient quantity, the metal frame is a suitable choice due to its high speed of execution and high resistance. But in order to answer the question that metal or concrete frame is better, it is not possible to be satisfied with these few parameters .
Stay with us to learn more about the construction stages of the metal frame building .
Construction stages of metal frame building
Before we go into the description of the steps of the implementation of the metal framework, you should pay attention to the fact that the plans, like the implementation of the concrete framework, have been completely checked and controlled so that there is no mismatch between the plans of the structure, architecture and facilities .
But let’s go to the construction stages of the metal frame building :
Making steel sections
Metal frame construction for small projects is done at the project site and for buildings over 6-7 floors in the factory. In the following, we will get to know more about each of the stages of making a metal frame, both in the factory and at the project site .
Construction of metal frame in the factory
To make a metal frame in the factory, first the sheets are cut according to the plan, then they are chamfered to perform groove welding, which is called strapping .
In the next step, the stiffeners are cut and ready for assembly .
Then the parts are assembled by spot welding and finally by automatic sub-powder welding machine under the protection of CO 2 gas Assembly of parts is completed .
At the end, the necessary controls must be carried out and approval must be obtained so that the parts are transferred to the project site and additional connections are made at the project site .
We suggest to read more about each of these steps, be sure to read the article Metal frame construction visit _
Construction of metal frame at the project site
As we said, in small projects, the construction of the metal frame and the execution of connections are done at the project site .
Before describing the stages of construction and installation of the metal frame, it is better to talk about the types of connections that are implemented in metal structures .
Types of metal frame joints
in the article ” Types of Connections “ We will talk more fully about the types of metal structure connections, but here we will give a brief description of it. We suggest that you do not miss reading that article at all .
Rivet
Rivets are one of the old connection methods that are now almost obsolete and are used only in special cases .
Rivets are made of special steel and can be prepared by cold or hot rolling. Rivets with diameters of 1 to 4 cm are produced in factories .
ASTM standard specifications, namely A502-Grade 1 of carbon steel for general purposes and A502-Grade 2 of high-grade steel for special purposes, are produced by manufacturers .
Bolted connections
The screws available in the market are used in two ways, normal or high strength, to make connections in steel structures .
But the question that arises is what are the criteria for choosing a screw connection? !
1) In light structures that are under static loads or in secondary members of the structure such as lape in gable roofs, wind braces and side restraints, it is usually more economical to use ordinary screws (with low resistance) .
2) When a skilled worker is not available for welding, the use of screw connections is superior .
3) If the steel structure is to be dismantled after some time, it is recommended to use screw connections .
4) In structures that are subjected to alternating loads and fatigue occurs in their connections, the use of high-strength screws with frictional connection function have better performance than welded connections or connections with ordinary or high-strength screws with reliable connection function .
Other advantages of screw connections include high speed of implementation, no need for special skills, being silent, and the possibility of opening and reusing it .
welded joints
Connecting the members of the structure with the help of heat and local melting and integrating the materials with each other is called welding fan .
Welded connections have a better appearance than screw connections, provided that the welding is performed properly and correctly, and their scope of application is also wider .
Nowadays, according to the progress of welding technology, it is possible to connect members from all kinds of steels by welding easily .
Due to the possibility of controlling the welding quality, a welding fan is usually used to make metal parts in the factory. In any case, it is very common to use welding tools in the workshop (where the structure is implemented) .
For connections in general beams as well as beams with rigid bending connections, the use of welding as a means of connection is widely used .
To read more about Types of welded joints And its details, be sure to click on the blue link and visit its article .
Installing the skeleton
After the implementation of the foundation, the column plate or base plate should be installed in the specified position. It is possible to implement the column page in three ways .
In the first method, the plate is welded column to column in the factory and is connected to the foundation at the project site by means of bolts that have already been placed in the foundation .
In the second method, stencils are first placed in place of the columns. After concreting the foundation, the stencils are removed and the columns are placed in their place and connected to the foundation with the bolts that have already been installed .
In the third method, the base plates are placed in place before concreting the foundation and the column is connected to it .
If you are wondering which method is more common, we must say that the second method is more useful due to its ease of implementation .
To read more about installation base plate And connecting the metal column to the foundation, first watch the video below, then click on the blue link and be sure to read the related article .
This video is only a short part of the comprehensive and complete training of the construction stages of the metal frame building of the Civil Academy .
Base plates play a very important role in transferring the load of columns to the foundation. For this reason, great care must be taken in its design and implementation .
For example, sometimes due to design requirements, the thickness of the column plate must be increased, which is not economical and difficult to implement and transport .
For this reason, other methods are used to strengthen the base plate, such as laying corners or reinforcing sheets. There are various methods to strengthen the base plate .
In the next step, the columns are made and installed. In order to make the columns, first the sheets are cut in certain sizes and bevelled .
Chamfering is because these sheets are well connected to each other by groove welding .
In order for the production of parts to be level and distortion does not occur, the sheets are welded on the mole chassis. Then the brackets are installed to prevent the angle from changing .
After completing the assembly and longitudinal welding of the members, the columns are ready to be installed .
In the next step, the main beams are made and installed. Their construction and installation is very similar to the construction and installation of columns .
After cutting and chamfering the sheets, the body and wings are assembled on top of each other. In the next step, the furnaces are installed and longitudinal welding is done by sub-powder or CO 2 device is done
At the end, the welds are inspected and controlled, and after approval, they are sent to the paint stage .
After sending the parts to the project site, the king beams are installed in their place according to the number of each part, from the lower to the upper floors .
After installing the main columns and beams of a part, it is time to plumb the columns .
As a workshop and important point, it is recommended that in long structures and multi-part columns, first the total amount of permissible instability is calculated according to the regulations and then the allowed amount is divided by the number of parts .
The number obtained in each part should be used as a criterion to control the unevenness of the columns. By using this method, at the end of the work, the amount of possible malfunction will be lower than the allowed values .
After the plumb work of the columns, it is time to execute the sub-beams. Sub-beams usually consist of I- shaped (I-shaped) sections .
Then the cutters as well as the end drill for the beam to sit on the king beam are installed on the beams and after controlling and inspecting the welds and painting, they are placed in their place .
Also, it is usually done at the same time as cutting the beams, cutting and making the stair railings .
Braces are implemented to deal with side forces such as wind and earthquake. There are different types of braces, which include: Divergent brace And Convergent brace .
Be careful that each of these frames are divided into two types, special and normal .
Divergent bracing has both stiffness and ductility characteristics because it is basically a suitable combination of flexural frame and convergent braced frame. Click on its blue name to read more about how it works, types and details of how to implement each one .
In general, in order to implement braces, gusset plates are placed in axle columns and beams and are connected to them by corner welding .
Then, the members of the braces, which are mainly made of double corner and stud profiles, are cut into suitable lengths and placed in place by welding .
Finally, after completing the assembly of braces and checking the correctness of the installation, additional welding is done. To read more about how to implement braces to the article ” Building Windshield “ visit _
Be careful, at the end of the installation of the metal frame members, the connections must be fully checked and the necessary approvals must be obtained .
Installation of the best roof for the metal frame
Maybe you have a question about what are the types of steel frame roofs? What is the best roof for a metal frame?
In response, we must say that steel and composite deck roofs are very common in the construction of metal frames, but to say which roof will be the best, we must check the conditions of that structure and then choose the best and most suitable roof .
Now let’s go to the types of metal frame roofs :
Steel deck roof
Steel deck roofs are made of steel sheets that are galvanized to prevent rusting against the moisture of the concrete .
Generally, the purpose of using galvanized sheet in the construction and design of steel deck roofs is to reduce vibration and increase the overall resistance of the structure against the loads .
For more details Steel deck roof Be sure to click on the blue link and be sure to read the related article .
Composite roofing
As we said, the composite roof is one of the most common and suitable methods for the implementation of the metal frame roof .
This type of roofs are resistant to the incoming forces due to the composite performance of steel and concrete at the same time, and for this reason, they are also known as composite roofs .
With more details about Composite roofing Be sure to click on the blue link to get acquainted .
Chromite roof
In general, the chromite roof is similar to the normal block joists in terms of performance, and the only difference is that the heel of the joists in the chromite roof is metal and in the block joist roof, concrete is used in its structure .
The way to implement this roof is very similar to block beam roofs, and in general there is not much difference between these two roofs, and they are usually used in buildings of 3-4 floors up to about 9 floors .
For more details Chromite roof Be sure to click on the blue link and read the related article .
Rofix roof
Rufix roof is actually the same as composite roof, in its execution, instead of boards or sheets, a type of mesh metal plate called Rufix, which has the same function as a mold, is used .
So Rufix is considered a type of concrete composite slab. The remarkable point in implementing this type of roof is that there is no need for jacks and piles and it is possible to concretize the floors at the same time .
in the article Rofix roof You will get to know more details about this topic, we suggest you visit it .
Vaulted ceiling
The vaulted roof is one of the oldest and most beautiful roofs that can be used in the implementation of the metal frame roof .
The vaulted ceiling implemented in steel frames to cover the level of floors and in historical and cultural buildings has more aesthetic and architectural aspects. This is despite the fact that the function of the roof is the same in both .
For example, in the implementation of historical buildings, this roof usually has more arches and the distance between the openings is large, but in common steel skeletons, it is usually performed between beams with an opening of 70 cm to one meter .
Be careful that due to the presence of an arch, which we call a vault, the vaulted ceiling has the ability to bear vertical loads, but it is not very efficient in bearing lateral loads .
With more details about the roof if you like percussion arch And to get to know its implementation tips, be sure to click on the blue link .
Block beam roof
You must have heard the name of block beam roof .
This roof is used more due to its ease of implementation, high work speed and low implementation cost compared to other types of roofs .
But in general, this roof is not suitable for the implementation of metal skeletons, and it is better to use steel or composite deck roofs in this type of skeletons .
in the article Block beam roof You will get to know more details about this topic, we suggest you visit it .
Joinery Building
After the completion of the skeleton (whether concrete or steel), the structure under construction enters a new phase of execution, which is called the joinery phase of the building .
Stay with us in the future to get to know the carpentry steps of the building well .
If you want to read about Building carpentry steps in order of priority Click on the blue link to watch the related video .
Building carpentry stages
It is well-known among builders and engineers that the giant of building a building is its carpentry stage .
You might say to yourself that the porcelain wall and carpentry is the easiest and most convenient part of building a building and even a simple construction worker can do it .
In response, we must say no!!! It’s not like this at all !!
Building carpentry has many details that cannot be summarized in the experiential knowledge of a construction worker .
Sometimes there are buildings whose carpentry stages take two to three times the time of excavation or execution of the skeleton .
Stay with us to learn about these steps. But if you want to see all these steps with their tips and details in the form of workshop videos like a professional engineer, you must go to Professional training of porcelain wall and building joinery Visit Imran Academy .
Let’s go to the carpentry steps of the building :
wall hanging
A porcelain wall is a process in which we put bricks and clay or concrete blocks together using glue or mortar to build a wall .
We suggest that before reading the rest of the article on building construction steps, first watch the following video to learn how to put up walls in simple language .
One of the important steps in the construction of structures is the Chinese wall because it plays a very important role in preventing the fall of debris during an earthquake. If you want with Analysis of structure behavior against earthquakes Get acquainted, click on the blue link and read this complete article .
In general, the purpose of the Chinese wall is to separate different parts of a structure and create spaces with different uses .
If the Chinese wall of the house is done unprincipledly, many problems will arise in the future, including insufficient resistance in earthquakes, passing noise and problems in joinery .
You should pay attention to this point in the process of building walls, that on sloping surfaces, the wall should be built in steps. Slanting of the wall is not allowed and the length of the wall ridges must always be horizontal .
Materials needed for wall hanging
The types of materials used in wall covering include :
1) Mortar
2) brick
In general, it is made of a mixture of clay, sand, feldspar, limestone and sulfates with water, this rectangular cube material. There are different types of bricks based on the production method, such as :
Pressure bricks that are often molded by hand and baked in local kilns .
Machine-made or perforated bricks that have 8 to 10 holes with a diameter of 1.5 to 2 cm so that the mortar penetrates these holes and makes the wall stronger .
This brick can be used in the construction of porter walls and reinforced by passing the rebar through the holes. Also, pay attention to the fact that their adhesion to the mortar is not suitable, so they are not used in the percussion arch .
Brick facade
Glazed brick
Lime sand brick
3) Blocks
In the next part of this article, we will learn about the types of blocks .
Heavy or normal cement block
In the construction of heavy cement blocks, ordinary sand, which is used for concrete production, is used .
Due to their weight, high density (about 2000 kg/m3) and larger size than other blocks, heavy blocks are often used in the construction of load-bearing and non-load-bearing structures, street tables and as molds in water .
To learn more about cement block Be sure to click on the blue link and read the related article .
Light cement block
Light cement blocks in mineral or industrial types have a low density (about less than 1700 kg/m3) and are available in different types such as Lyca, Perlite, Liper and Perlex .
Perlite ore is a naturally occurring inorganic mineral. Perlite is a glassy volcanic rock that, when heated to fusion temperature, its molten grains increase in volume from four to twenty times their initial volume .
After this, the internal structure of perlite becomes something like foam. Actually, this foam is in the form of microscopic glass bubbles. This physical transformation of perlite has made it known as a very efficient and low-density insulation and produce perlite blocks .
Lika pumice is industrially produced and its main ingredient is clay .
Lyca grains are obtained from the expansion of clay in rotary kilns. The temperature of these ovens sometimes reaches 1200 degrees Celsius. Lika aggregates have a rough surface and are round .
When the clay reaches this temperature, gases are released from it, which causes the grains to expand. The expansion of grains has made Lika blocks light and very resistant .
Clay block
In general, clay wall blocks are divided into two types with foam and without foam in sizes of 7, 10, 15 and 20 cm .
A good and high-quality clay block is a block that has a dense and strong structure and produces a ringing sound when it collides with each other .
Also, having a uniform color and a surface free of any cracks is another characteristic of a good clay block. To learn more about details Clay block Be sure to click on the blue link and read the related article to the end .
Autoclaved light concrete block ( Siporex – Heblexia ACC)
Hablex block weighs about 550 to 600 kg per cubic meter, which is much less than the weight of brick, and one of the main ingredients in its composition is silica, which makes it heat-insulating .
It is easy to install the structures in which this type of block is used; Because cutting and connecting it using screws is often done easily .
One of the other advantages of this block is that if you need a special size block, you just need to order it. Because these blocks are easily sawn and cut to your desired size .
Block production and execution steps Heblex It has many tips and details that are not included in this article, so we recommend that you click on the blue link and read the related article to learn more about it .
Perlite and gypsum blocks
These blocks have a crotch and a tongue and are easily put together during operation, and the mortar between them is a special glue that is produced from a mixture of plaster .
The dimensions of these blocks are relatively large (about 500 x 666 mm) and they are usually produced in thicknesses of 6 to 10 cm. You can also cut the desired piece with a hacksaw .
3D panel
One of the other methods of implementing the wall of the building is the use of three-dimensional panels .
3D panel is a lightweight prefabricated method that is used in reinforced concrete (reinforced concrete) buildings to implement the walls of tall structures .
The panels consist of two welded steel grid plates, with an insulating core placed in between and connected by a number of truss members, which after installation, concrete is sprayed on it from both sides .
We recommend to read about the executive detail 3D panel Be sure to click on the blue link and go to the related article .
dry wall
Another way to implement the wall of the building is to use dry wall. Drywall is a sheet of plaster that is placed between two layers of cardboard and does not need materials such as cement, plaster, etc.
Drywalls are used for the internal walls of the structure or the covering of its external walls .
The following are the advantages of using dry wall :
High execution speed
light weight
Repair possible
Easy to move
Good seismic performance
The implementation of dry wall requires expertise, that is why experienced people should be used in this work .
The detailed description of dry wall implementation is not included in the article on building construction steps. For this reason in the article ” dry wall “ We talk about its implementation points .
In order to implement the building’s wall tiles, first the first row of all the walls is implemented, which is called tile streak or single streak .
Then they are installed at the beginning and end of the wall and plumb. In the next step, connect and fix the bars to the floor and ceiling, and then using stringing, the wall is arranged row by row .
in the article ” Chinese Wall “ We talk about the implementation details of this topic in detail. Do not miss reading this article at all .
As we said, the Chinese wall in building carpentry consists of different parts, which we will explain below :
Chinese chair
One of the important steps in the Chinese wall is a Chinese seat building, the purpose of which is to lay several rows of bricks, which causes the difference in height between the inside and outside of the building .
The wall that creates this difference in height is a chair and its implementation is called a Chinese chair. In general, the chair wall is a wall that is placed between the load-bearing wall and the base .
The Chinese chair can be seen both in structures with a masonry frame and in structures with a concrete or steel frame. But in structures with a masonry skeleton, it requires a more important role, a wider range of application and more detailed implementation details .
In general, it can be said that the purpose of the Chinese chair includes the following :
1) The height difference between the inside floor and the outside floor of the building
2) not placing the walls of the structure in contact with the surrounding soil and exposed to moisture
3) The residence being higher than the ground level, feeling more secure and having a better view
4) Leveling the floor of the building and fixing its slope in uneven lands
5) Providing the necessary height to the level of flooring
6) Passage of sewage pipes under flooring
7) Reducing the stress on the soil to the limit of the soil’s tolerable stress
wall post
One of the important points that we must pay attention to in the implementation of building walls is the necessity of implementing wall posts. Wall post or wadar in simple language is a coil with a certain length, which is mainly used to integrate walls .
In fact, the wall post protects the walls, which are non-structural components, against earthquake movements, and during an earthquake, the least amount of damage occurs due to force absorption .
In general, when the length of the wall is more than 4 meters or its height is more than 3.5 meters, vertical and horizontal reinforcement is used as a support to restrain the outside of the wall plane and its reinforcing components .
For that about executive details wall post And to know more about its rules, click on the blue link and read the related article .
bed rebar
Another important thing in wall covering is the implementation of bed rebar. We suggest watching the video below to learn more about this topic .
The bed rebar and its mortar act like a thin concrete beam and increase the bending resistance outside the wall plane .
In fact, the bed rebar helps the blocks stay together as they move out of plane. Although it is mandatory to implement the bed rebar next to the implementation, but it is possible to not implement the broken studs when using clamps and hooks, and it is possible to connect the wall to the frame through clamps .
Pay attention that similar to forced implementation, the wall should be separated from the frame by 1% of the height of the wall (usually 3 cm) with the help of unolite or moisture-proof stone wool .
To learn more about bed rebar Be sure to click on the blue link and read the related article .
Door sill
The implementation of door or window sills is one of the important things that starts almost at the same time as wall decoration. Door sill is actually a beam that is placed above the window or door to bear the incoming load and transfer it to both sides of the wall .
Pay attention to the fact that for openings larger than 2.5 meters , wall posts and door sills must be installed .
But in smaller openings, if a metal frame is used and metal fasteners are welded to the frame, there is no need to implement the wall post, otherwise it becomes necessary to implement the wall post .
In general, door sills are used in places where the walls start at a distance from the ground. Because it supports the weight of its upper wall so that it does not collapse .
Door sill It has different materials, including wooden, brick, steel and concrete. To read more about the tips and regulations of this topic, click on the blue link and visit the related article .
Flooring
In this part of the building implementation training article, we get to flooring. To implement the floor in a building, we must implement the appropriate floor according to the environment and then proceed to implement ceramic, stone or any other flooring .
In the following, we will learn more about these steps :
Slope
One of the important points in flooring is the slope of floors, courtyards and roofs .
When it rains or washes, the resulting water and moisture must be drained in the shortest time and reach the place of the toilets. The later the drainage is done, the more time the water has to penetrate the flooring .
It is obvious that the more the slope of the flooring is towards the slope, the faster the water drains .
To start tilting, they first chrome it. Chromes are thin strips with a thickness of 10 cm and have a variable height that fits the desired slope .
Chromes divide the roof floor into smaller sections, which is called chrome banding .
After chrome plating, the empty space between the chromes is filled with light materials such as mineral pumice or light concrete such as foam concrete .
Be careful that due to the fact that the height of the chromes changes from the end points to the location of the gutter, the height of the filling material should also be variable and follow this height change .
To read more about the implementation details of floor slope or Roof slope Click on the blue link and be sure to read the related article .
Insulation
As you know, flooring is done with a variety of materials such as stone, ceramic, mosaic, wood, asphalt, etc., all of which have small pores that allow water to easily pass through them .
Even if the pores are very small, moisture is still transferred. The seam between stones and ceramics that is no longer in its place .
In general, insulation is necessary for the bathroom floor, roof, kitchen and all parts that are in contact with water .
After finishing the slope, it is time to perform insulation .
Of the two main methods Moisture insulation We can mention Qirguni and Izogam. To learn about the tips and details of these two methods, be sure to click on the blue link and read the related article .
Floor Covering
There are different materials for flooring, such as stone, ceramic, tile, laminate, epoxy, etc., each of which has its own advantages and disadvantages .
Knowing the features and practical tips of each of them can help us make the best choice for our flooring material .
In the following, we will try to explain the stones and ceramics, which are the most widely used materials for the implementation of flooring, but we suggest that if you want to get acquainted with all these materials, you must visit the professional training of wall covering and building joinery of the Civil Academy .
Rock
In general, stones are a costly and expensive material because they are completely natural and it is difficult to extract them from mines. Especially if we want to use them in larger sizes .
As you know, the size and dimensions of building stones, Slab stone they say
Floor slabs can be installed by two methods: mortar and glue. To implement both methods, first the surface under the work must be completely smooth, uniform, clean and free of any dust .
In the next step, we apply stone glue or mortar to the desired surface using a suitable tool (smooth or toothed trowel), then fix the stones on it and hit them with a plastic mallet .
The important point in all these methods is that in order to have the same distance between the slabs and to have smooth and uniform straps, it is better to use spacers (clips and wedges) or equal and separate them after the glue or mortar hardens. .
We recommend that if you want to learn more about the details of the implementation of this material, be sure to click on the blue link and read the related article .
ceramic
Ceramics are one of the most widely used materials for flooring .
Ceramics are actually a type of tiles made of clay and may be unglazed or glazed .
The cost of this material is more affordable compared to other materials such as stones or laminates, but it should be noted that in order to have a more beautiful space, with more resistance and to achieve the desired result in the implementation of ceramic tiles, it should be used of its high quality. .
Because 2nd and 3rd grade ceramics are often warped or distorted and in the end, they create an inappropriate and unaligned appearance .
To distinguish between high-quality ceramic and tile, it is enough to place the glazed part of the two tiles on top of each other and observe the amount of empty space between them .
Be careful, the larger the empty space between the two, the more the tiles wave and ultimately the lower the quality of the tile .
The installation and implementation of ceramics is almost the same as the implementation of stone, and both mortar and special glue can be used for its installation .
Be careful that if the ceramic you are using is of the porcelain type, it is better to use a special glue instead of mortar because porcelain ceramics have very low water absorption and therefore do not mix with mortar .
If you want to know more details in this field, definitely go to the article Ceramic floor visit _
Implementation of the view
So far in the article on building construction steps, we have learned about the flooring section in carpentry, and now we are going to the tips of facade implementation .
in the article Types of building facades We have talked about all types of facades. Click on the blue link to read it .
In general, in the past years, various materials have been used for building facades, the most common of which are stone, brick, and washed cement .
The selection of each of these materials depends on factors such as the weather conditions of the project location, economic conditions and the client’s taste .
For example, it is not recommended to use stone material in dry and mountainous areas, because this material cracks when the air gets too cold .
Or that the use of brick and stone costs the employer more than the use of white cement .
in the article exterior design of building We have covered all the principles of facade design. Color blue on the link to read it .
In the following, we will get to know more about the types of facade implementation materials, stay with us .
stone facade
For facade implementation, there are different stones such as travertine, granite and marble, each of which has its own unique characteristics (from price to resistance). To learn about the characteristics of each of these stones, we recommend you to read the article Slab stone visit _
Most of the stones have very little porosity and this causes very little conflict between this material, mortar and wall. As a result, after some time due to sunlight or infiltration of rain water, the stones become loose in their place and fall from the wall, which causes many life or financial risks .
But what is the solution?
In response, we must say that it is better to use special connections and fittings (dry method) to implement stones on the wall .
This method is much faster and safer than the implementation method, but it also costs more .
Another way to implement the stone facade and fix the stones on the wall is to use glue or mortar. (more method)
But the remarkable thing about this method is that you must scoop the stones. But what does scoop stone mean?
We suggest that you watch the following video first to learn about this topic .
Now that you are familiar with the stone scope after watching the video above, we must say that there are different ways to perform the scopes. Such as using the wire method, biting, two legs, three legs, z and butterfly .
To get acquainted with each of the mentioned methods, we suggest to read the article Stone Scoop visit _
Brick facade
Another common material in the execution of the facade is the use of bricks .
To make this widely used material, clay, sand, feldspar, limestone and sulfates are first mixed with water, then molded and finally baked in the oven .
There are different types of bricks, each of which has unique characteristics. For example, we can mention hand-made brick, Kazakh (military) brick, pressed brick, glazed brick, decorative brick, and refractory brick .
We suggest that you read the article to learn more about the details of this topic ” What is a brick “ visit _
Washed cement facade
Hail and Mahoti cement facade
Scratched cement facade
Cement facade and washed mosaic
Colored cement facade
Roman view
Composite view
Glass facade
Wooden facade
dig a well
In general, in the well drilling department for a building, we need two types of absorption wells for sewage disposal and rainwater transfer and earthing wells for electrical discharge of unwanted currents, which we will give more details about each of them .
Earth well
Have you ever touched the metal body of your dishwasher or refrigerator and felt an electric shock?
This feeling of electric shock is because the electric current is transferred from your body to the ground .
While if the electrical devices in your house are connected to the earth well, the electric current tends to follow a path that has a lower resistance, so it prefers to change its path instead of passing through the person’s body, which has a resistance of 2500 to 5000 ohms. and pass through the earth well, which has a resistance below two ohms, and the person is protected against the risk of electric shock .
For that with the concept and implementation tips Earth well To learn more, we suggest you click on the blue link and read the related article .
absorption well
You may have thought about where this water goes while washing your hands? Or where does the sewage from the building units that goes down the pipes end up? Maybe you have said to yourself when it rains, where does all this water flow on the surface of the roof end up and what fate awaits it .
So let us tell the application of absorption well and the purpose of its implementation from the beginning .
The most important purpose of implementing the absorption well is that all the sewage of the building and the flowing rainwater enter it in order to prevent it from spreading in the vicinity of the soil and absorbing the fluid into it .
But pay attention to this point that if your house’s sewage is connected to the municipal sewage system, you don’t need to use a sewage absorption well and only one well is needed to drain rainwater to the underground aquifers .
To learn more about the concept absorption well And its implementation tips, we suggest you click on the blue link and read the related article .
Types of wells in terms of performance
Now that we have learned more about the purpose of drilling wells in the building, it is better to know that the performance of wells is generally divided into two categories: absorption and septic .
Septic well
This well is made of impervious and corrosion-resistant materials such as concrete, building materials, polyethylene, polymer materials, etc., and its task is to maintain the wastewater and not allow leakage from it or to it by the surrounding environment .
These wells must be emptied in short and specific periods by tankers or special devices .
absorption well
The absorption well should be built in lands that have less absorbent clay so that absorption can be done well in the storage part of the well. In areas that have more clay, they often use a septic tank .
Be careful, when the absorption well is filled and its capacity is reduced, it should be emptied and its volume added by digging the ground .
Elevator
In the past, the use of elevators was completely a matter of taste and was installed in buildings if there was sufficient budget .
But today, it is absolutely necessary to use an elevator in buildings whose vertical movement length is more than 7 meters from the main entrance floor (buildings with more than 3 floors) .
Also, at least two elevators should be used in buildings with a vertical movement length of more than 28 meters .
Be sure to watch the video below to get familiar with the operational tips of the elevator. This video is only a short part of the professional training of wall covering and carpentry building of Imran Academy .
In general, elevators are divided into two categories :
Hydraulic elevator
A hydraulic jack is used instead of an electric motor and a tow wire in a hydraulic elevator, and with the help and injection of a high-pressure flow of hydraulic oil, the hydraulic jack moves to move the elevator cabin on the floors .
Electric traction elevator
The operation of the traction electric elevator is such that it consumes less energy than other types and even the hydraulic elevator and also has a higher speed .
The reason for the low energy consumption in this type of lift is due to the friction created between the tension plate of the lift and its towing wire, which maintains the balance between the weight and the elevator chamber due to the design of the lift and causes the vertical movement of the lift in complex floors. .
So far, you have learned about the two types of elevators, electric and hydraulic, now you may want to know the advantages and disadvantages of each of these elevators, so that you can make the best choice according to your circumstances .
In the photo below, we will learn more about the advantages and disadvantages of each of these elevators .
In general, to run an elevator, the following steps must be implemented :
1) Elevator design
2) Implementation of elevator well and iron
3) Supply of elevator parts
4) Elevator installation
5) Delivery and completion of the project
Implementation of false ceiling
If we want to explain about the false ceiling in a simple language, we must say that it is a non-structural roof that is connected to the skeleton of the building and transfers the load to it. So, with these interpretations, there is an empty space between the structural ceiling and the false ceiling, which is very suitable for the passage of utility pipes and building wiring .
Also, among the other advantages of this roof, we can mention sound and heat insulation, creating a decorative space and proper lighting .
Now that we are familiar with the false ceiling, we go to its types :
1) Kenaf (integral)
2) Mesh roofs (tiles)
3) Rabbits and chalk
4) Context
5) Grillium
6) Dampa
7) Luxalon
If we want to give a general explanation about the types of false ceilings mentioned, we must say that Kenaf, mesh and Rabits and plaster ceilings are used in residential buildings and Contex, Grillium, Dampa and Luxalon ceilings in commercial-office buildings .
Building whitewash
The question you may face is how a building wall is so smooth, one hand and without any indentation or protrusion?
In response, we must say, after the execution of the step Chinese wall It is time to apply a layer of plaster and soil to cover all the possible defects and unevenness of the wall and make the wall ready for painting or installing wall paper .
In the following, we will get to know the stages of plastering or whitewashing of the building :
1) Wall chrome plating and bullion
2) Implementation of plaster and soil mortar
3) Final plastering
Covering the walls
There are different materials for covering the walls, the choice of each of them is completely personal and you can choose any of them according to your available budget. In the following, we name these covers :
Painting
This coating is less expensive than other wall coatings and is easier to implement. For wall painting, you can use plastic, oil, or acrylic paints, which are a new generation of construction paints .
Each of these paints has its own advantages and disadvantages, for example, plastic paint cannot be washed, but it is odorless and cheap, and has a high speed of application. (It dries quickly.)
In the professional training of wall painting and building joinery, we have taught building painting in a completely professional manner, knowing colors, characteristics and their combinations, so don’t miss watching this training at all .
Tools needed for painting
What are the tools needed to paint the walls of a building?
1) Brush
2) Roller
3) Sandpaper
4) Postab
5) Spatula
6) High school
7) Color
The steps of painting on a plaster wall
1) Opening the cracks and removing the roughness of the plaster
2) apply oil under the work
3) A few hands of putty and sanding
4) Lubrication (only the places we could apply it are enough!)
5) applying the first layer of paint (lining) and staining
6) applying the second layer of paint
7) applying the third layer of paint
The steps of painting the wall are already painted
1) Opening the sockets and removing or covering anything that should not be colored !
2) Opening the cracks and shaving the tabla shells
3) A few hands of putty and sanding
4) Applying oil (it is enough for the places we could apply it!)
5) applying the first layer of paint (lining) and staining
6) applying the second layer of paint
7) applying the third layer of paint
Wallpaper
Wallpaper is another popular material for covering walls. This material has its own advantages and disadvantages that we will discuss .
For example, the advantages of wall paper are quick installation, high variety in design and color, and no need to collect equipment during its implementation .
This is while the higher price compared to wall painting and less washability than oil paints are among the disadvantages of this material .
Wall Plugs
Another material for the walls is the use of wall coverings, which have a high variety and are more expensive than painting or wallpaper .
For example, we can mention wooden, fiberglass, PVC, stone, ceramic, etc. wall coverings .
Door and Window
We can safely say that the installation of doors and windows promises you that the end of your building construction project has come and you can use it little by little. Now let’s know more about each one .
Door
After the implementation of the door sole and the implementation of the door frame, it is time to install the doors .
The beauty of the doors of a building is one of the most influential points in the interior design of a space .
Wood is one of the main and widely used materials in the door production industry, and its high hardness and strength, colorability, resistance to moisture and insects are among the features that have made this material popular .
Woods such as oak, alder, walnut, maple, beech and pine are among the common types used in the production of wooden doors .
window
In general, window frames are divided into three categories: wooden, metal (iron or aluminum), and composite ( fiberglass, PVC , and UPVC) .
Using each of these materials as a window frame has advantages and disadvantages. For example, upvc windows are more affordable than aluminum windows, but they have less variety of colors and are heavier .
As you know, in the past, it was not common to use double-glazed windows, but since 2010, due to the determination of criteria related to saving energy, reducing noise pollution, and preventing dust, all builders are required to use these windows .
The steps of building and implementing doors and windows are very detailed and are not included in this article, so we suggest that you visit the professional training of building wall and carpentry of the Civil Academy to learn more about this topic .
Cabinets and wardrobes
As you know, the implementation of cabinets and wall closets has many details that cannot be included in one article. We recommend that you watch the following video, which is only a short part of the Chinese wall and carpentry training of the Civil Academy building .
Checklist of building construction steps
So far in the article, you have fully familiarized yourself with the details and construction stages of the building. Sometimes you may get confused as you go through these steps as to which is done and which is not. Or the supervising engineer may ask you for a list of completed works .
What is the solution in this situation?
One of the best methods is to use a checklist of building construction steps. In the continuation of this article, we have put two examples of these checklists for you to get to know them better .
Be careful that these checklists are only two examples of checklists (installation of the metal framework of the building and concreting operations) that we suggest to you, and you can prepare and use your own checklist .
We also recommend that after preparing the checklists in order to be able to present an excellent status report to your employer so that the employer will pay the costs incurred up to that time, you should definitely attend the meter, estimation and training course. Teaching writing postures Visit Imran Academy .
Professional training of construction stages
In the elite professional training of building implementation, we take the stages of demolition, concrete skeleton implementation, steel skeleton implementation, porcelain wall and carpentry implementation under the microscope along with workshop videos. We suggest you click on the blue link and view the topics and examples of this tutorial .
Executive trainings of Imran Academy are provided in 4 main steps along with additional trainings including drawing training with AutoCAD, training of 30 basic techniques of negotiation and training beyond practical implementation of stairs .
Demolition, excavation and pit stabilization training
The first step is training on destruction, excavation and stabilization of the pit .
In this training, you will learn about all the details of obtaining demolition and renovation permits, equipping the workshop, description of the demolition stages and its important points in the workshop, demolition of the common wall, soil sampling, excavation and all pit stabilization methods with workshop videos .
You will also visit two nailing projects, one anchorage project, one truss guard structure project, one under-foundation drainage project and two complete top-down projects and learn the work steps .
In addition, the seventh, twelfth topic and workshop safety regulations, etc. were also examined in detail in this training .

Training on the implementation of concrete skeletons
In the second step, we have the concrete skeleton implementation training, which describes all the stages of the skeleton implementation in 6 sections .
These 6 sections include reinforcement, molding, foundation implementation, skeleton implementation, concreting and types of concrete slabs for which we have a workshop video for each of its concepts .
For example, for different types of slabs, a Ubot roof project, a Kubiax roof project, a Bubble Deck roof project, a Waffle roof project, an Intel Deck roof project, a concrete slab and beam and block project have been visited in several complete projects. It is fully explained in the workshop .

Training on the implementation of steel skeletons
The third step is to teach the implementation of steel skeletons, which is published in 7 general sections .
These 7 sections include the construction and installation of steel sections, all types of connections in the steel frame, lateral bearing systems (such as types of steel braces or steel shear walls), screw connections, welded connections, installation of the frame and all types of steel frame roofs .

Chinese wall training and carpentry implementation
The fourth step is the training of the Chinese wall and the implementation of joinery, which has been prepared and compiled in 13 sections with workshop videos for you, dear engineers .
These 13 training sections include porcelain wall, plastering and plastering, wall tiling, tilting and mosaic work, flooring and floor stonework, plastering, facade implementation, insulation, well drilling, elevator implementation, false ceiling implementation, painting. , wall paper, cabinet and door and window implementation .

At the end of this article, we have to say that if you have just graduated from university or you don’t have much work experience in your resume, in these days when the market of competition between experienced engineers has become very hot, by viewing the above trainings, you can improve your executive knowledge compared to your peers. And increase your age so that you can make this winding path of success smoother for yourself .
Imran Academy is always by your side in this way. Trust our knowledge .
Architecture and interior decoration and trends related to it
We hope that at the end of this article, you have answered your questions about the building construction process, and we thank you for staying with us until the end of the article. Share your thoughts about this article with us .


No comment